

How To Enlarge A Picture On Photoshop
Best Style To Overstate Images In Photoshop
This tutorial shows you how to upscale and enlarge an image in Photoshop CC 2018 and later without losing quality and while keeping detail and textures looking great using Preserve Details two.0.
When it comes to resizing images in Photoshop, the general rule has always been that yous tin make an image smaller than its original size, but y'all can't make it larger. Or at least, you can't make it larger if yous care near image quality. To brand an image smaller, all Photoshop really needs to do is take some of the pixels from the original paradigm and toss them away. It sounds like a bad thing, but the effect is merely the reverse. The smaller version commonly ends up looking sharper than the original.
Simply making an image larger than its original size is a whole other thing. Photoshop needs to add pixels to create item that wasn't there before. And if that sounds like a bad matter, that's because it is. All Photoshop can do is guess at what the new pixels should look similar, and and then it tries to blend the new pixels in with the originals. The results haven't been swell. Depending on which upsampling method you used, your larger version usually concluded up looking soft and dull or chunky and oversharpened.
At least, that'southward the way it's been up till now. But Photoshop CC 2018 introduces a brand new upscaling algorithm known as Preserve Details 2.0. Information technology's the sequel of sorts to the original Preserve Details algorithm that was added in an earlier release of Photoshop CC. Preserve Details 2.0 is by far the nearly advanced upscaling technology that Photoshop has always seen. And if you still believe that you can't brand an image larger without it looking terrible, Adobe and Photoshop CC 2018 are out to show y'all incorrect. Permit'due south see how it works!
Since Preserve Details 2.0 is only available as of Photoshop CC 2018, you lot'll need Photoshop CC to use information technology, and you'll want to make certain that your copy is up to appointment.
This is lesson viii in my Resizing Images in Photoshop serial.
Let's get started!
How To Upscale Images With Preserve Details ii.0
Step 1: Open Your Image
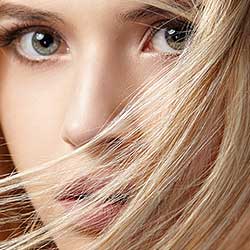
Open the image you want to enlarge. I'll use this image so nosotros can meet how good of a job Preserve Details two.0 can exercise, not merely on fine particular like eyes and hair simply also on skin texture (portrait photo from Adobe Stock):
The original image. Photo credit: Adobe Stock.
Step ii: Make Sure "Preserve Details ii.0" Is Enabled
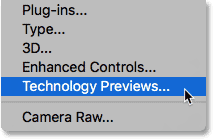
Even though Preserve Details ii.0 is included with Photoshop CC 2018, it'south not officially part of Photoshop simply yet. Adobe considers information technology a technology preview, and to use it, we demand to make sure information technology's enabled. Nosotros do that in the Photoshop Preferences. On a Windows PC, go up to the Edit menu in the Menu Bar. On a Mac, go up to the Photoshop CC carte. From at that place, choose Preferences, and and then choose Applied science Previews:
Opening the Technology Previews preferences.
This opens the Preferences dialog box to the Applied science Previews options. Make certain Enable Preserve Details 2.0 Upscale is selected, and and then click OK to close the dialog box:
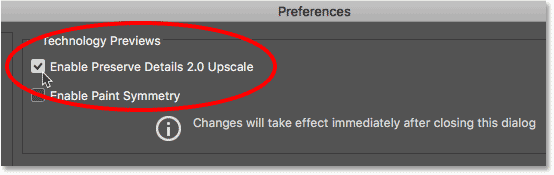
The "Enable Preserve Details 2.0 Upscale" option.
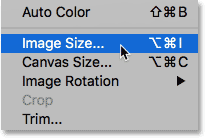
Step three: Open The Paradigm Size Dialog Box
Open up Photoshop'due south Epitome Size dialog box past going up to the Prototype menu and choosing Image Size:
Going to Image > Prototype Size.
To come across more than of your epitome in the preview surface area, click and drag the bottom right corner of the Image Size dialog box outward to make it larger:
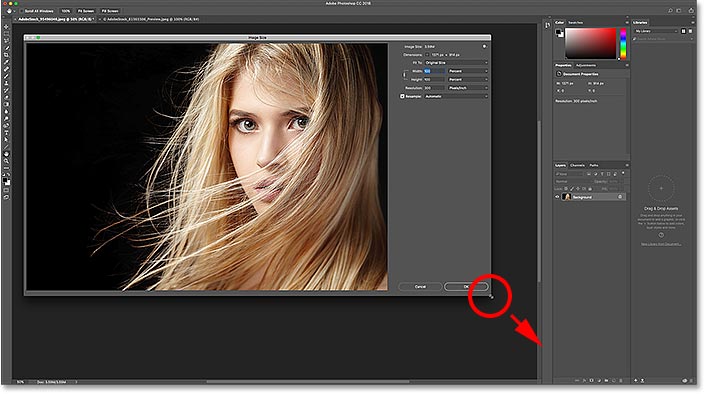
Resizing the Image Size dialog box.
Step iv: Select "Resample"
In the resizing options along the right, make sure Resample is selected. This tells Photoshop that we want to change the physical dimensions of the image. In other words, we want to add or remove pixels:

Selecting the "Resample" pick.
Step 5: Alter The Width And Height
Enter your new dimensions for the image into the Width and Pinnacle fields. By default, Width and Elevation are linked together, so changing one automatically changes the other. Since our goal hither is just to see how much of a difference Preserve Details 2.0 can make, allow's push things across reason by setting both the Width and Height to 400%:
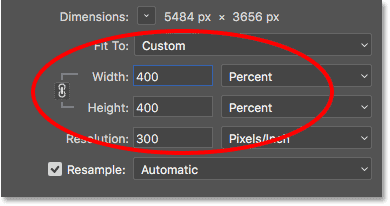
Increasing the width and height of the prototype past 400%.
Step 6: Alter The Resample Method To "Preserve Details 2.0"
Past default, the resampling method (the algorithm Photoshop will use to add or remove pixels) is set up to Automatic. This ways that Photoshop will automatically choose the best algorithm for the job. At to the lowest degree, that's the idea:
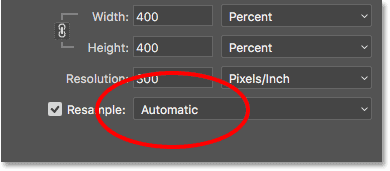
The resample method ready to "Automatic".
The problem is, even though we've enabled Preserve Details 2.0 in the Preferences, and information technology'due south by far the best pick for enlarging images (as we'll see in a moment), Photoshop will not choose it when Resample is set to Automatic. Instead, it will utilise the original Preserve Details algorithm which was introduced in an earlier version of Photoshop CC. This volition most probable modify one time Preserve Details 2.0 is officially added to Photoshop. Merely for at present at least, to utilise Preserve Details 2.0, nosotros demand to select it ourselves.
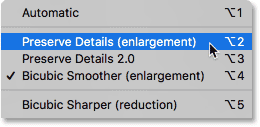
Click on the word "Automatic" to view a list of all the resampling algorithms nosotros can choose from. The ones for upscaling the image are at the top. Select Preserve Details ii.0. If you're not seeing Preserve Details 2.0, yous'll want to go dorsum and make sure you've enabled it in the Preferences:
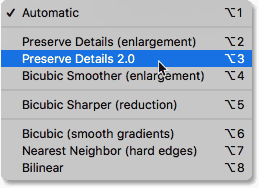
Setting the resample method to "Preserve Details 2.0".
Previewing The Results
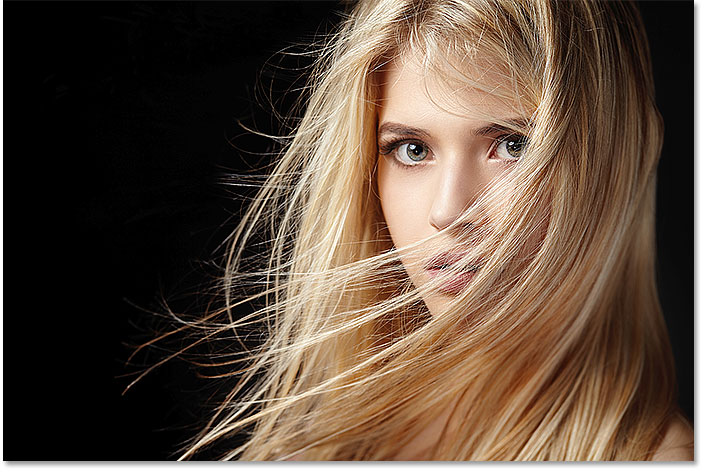
Equally soon every bit you select Preserve Details 2.0, the preview window on the left will update to show you what your upscaled prototype will look similar using this new option. Yous can drag your image effectually inside the preview window to inspect unlike areas:
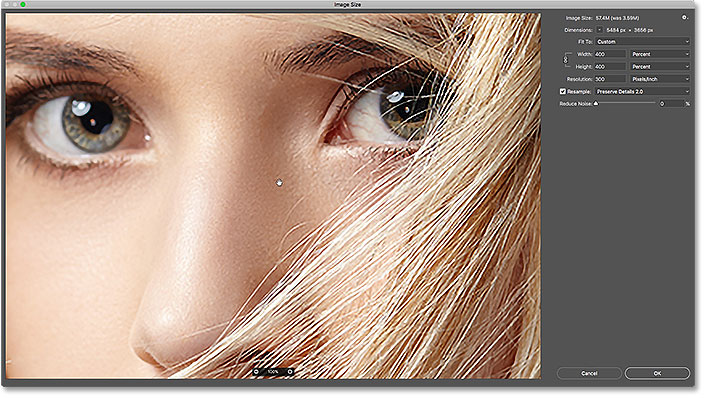
The preview window showing the Preserve Details ii.0 results.
Comparing Photoshop'southward Upscaling Methods
Bicubic Smoother
To go a meliorate sense of how much of an comeback Preserve Details 2.0 really is over Photoshop's previous upscaling methods, let'south do a quick comparison. Offset, position your image in the preview window so that you lot're viewing an area of fine detail. So, click once more on the resample method to re-open the list. Beginning by selecting Bicubic Smoother:
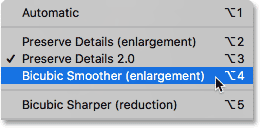
Setting Resample to "Bicubic Smoother".
Bicubic Smoother was the best upscaling method we had dorsum in Photoshop CS6 and earlier, and it does an okay task. But equally it's name implies, Bicubic Smoother tries to make clean up any problems by smoothing out the entire prototype. If we look at the woman's eye on the right, along with the strands of hair in forepart of information technology, we run into that those areas now look a lot softer and less detailed than they did earlier:
Bicubic Smoother makes the upscaled paradigm look also soft.
Preserve Details (Original)
In Photoshop CC, Adobe introduced a new upscaling algorithm named Preserve Details. Select it from the Resample pick:
Setting Resample to the original "Preserve Details".
Preserve Details does a much improve job of keeping important details in the image, as over again we can come across in the woman's eye and hair which at present appear much sharper. Just where Bicubic Smoother made things too soft, Preserve Details does the opposite. The image now looks oversharpened. Everything has a "chunky" look to it, especially the woman'south skin texture, which is something you definitely don't desire to oversharpen:

Preserve Details can make the upscaled image look too sharp.
Preserve Details 2.0
Now that we've looked at Photoshop'south previous upscaling options, allow's compare them to the new Preserve Details 2.0 in Photoshop CC 2018. I'll reselect it from the list:
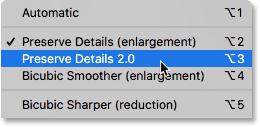
Setting Resample to "Preserve Details 2.0".
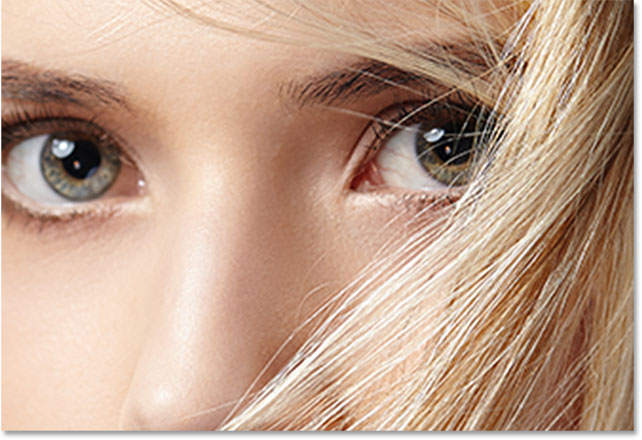
Preserve Details ii.0 uses avant-garde, "deep learning" artificial intelligence to detect and maintain of import image details without oversharpening annihilation else. As shortly as I select information technology, the preview in the Epitome Size dialog box instantly looks a whole lot better. Gone is the depression-item softness of Bicubic Smoother and the chunkiness from the original Preserve Details. Instead, detect how amazingly sharp her centre and hair now expect, well-nigh to the point where y'all might think the image was actually shot at this higher resolution. Meanwhile, Preserve Details 2.0 has largely avoided sharpening her skin texture. It remains nice and smooth, simply as information technology should.
Keep in listen that we've upscaled the image past 400% which is beyond what you would typically do in a normal state of affairs. All the same fifty-fifty at this extreme amount of upscaling, Preserve Details 2.0 gives us outstanding results:

The vastly improved upscaling result using Preserve Details 2.0 in Photoshop CC 2018.
A Side-By-Side Comparison
Here'southward a quick side-past-side comparison showing all 3 upscaling methods in activeness. Bicubic Smoother is on the left, the original Preserve Details is in the center, and the new Preserve Details ii.0 is on the right. Once more, these are all with the paradigm scaled up by 400%. As we can see, neither of the previous two upscaling methods tin can match the impressive results of Preserve Details ii.0. Note that these images have been resized and compressed for the web. You'll see more dramatic differences with your own prototype in Photoshop:
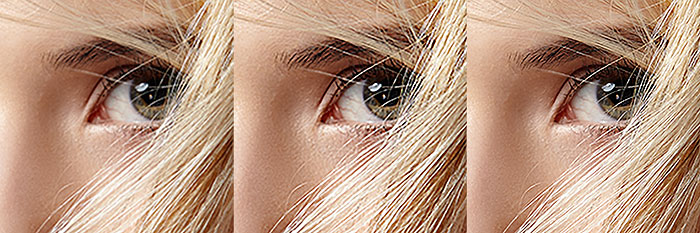
The event from Bicubic Smoother (left), Preserve Details (heart) and Preserve Details 2.0 (right).
To upscale your paradigm, make certain Preserve Details two.0 is selected as your resampling method, and and so click OK to close the Image Size dialog box. And there we have it! That's how to use Preserve Details 2.0 for upscaled images that look better than ever in Photoshop CC 2018!
You can bound to any of the other lessons in this Resizing Images in Photoshop chapter. Or visit our Photoshop Basics section for more topics!
Other Stuff
© 2022 Photoshop Essentials.com.
For inspiration, non duplication.
Site design past Steve Patterson.
Photoshop is a trademark of Adobe Systems Inc.
Source: https://www.photoshopessentials.com/basics/upscale-images-photoshop-cc-2018/
Posted by: abdulbeepastry.blogspot.com
0 Response to "How To Enlarge A Picture On Photoshop"
Post a Comment